Over the years, I’ve worked in so many different home studio setups, and I’ve encountered so many different challenges that come with recording in your home. One of those challenges is getting rid of noise in the recording space.
If you are reading this right now you probably have had some trouble with background unintentional noise being picked up by your microphone and ending up in your recordings.
The truth is most home studios are built in spaces that are typically not optimized for recording audio hence it takes some doing on your part to optimize the space and come up with techniques that improve the recording process.
Here are some tips that you can use to record music at home without noise:
Before we get started, you need a Digital Audio Workstation that is qualified to help you record music without noise. Check out my DAW recommendations here
With that said, lets get into how you can record music without noise..
Scan Your Room For Noise Sources
You basically need to become more aware of your recording room; you need to know the quieter spots and the noisier spots. This will make you aware of the particular places or spots in a room that you need to avoid or utilize when recording.
You can perform a room scan by turning your microphone on and turning the gain level up so that your microphone can be able to pick up any noise while you walk around with it.
After you notice some noise or interference, you can then see if it’s possible to get rid of that noise. If you’re not able to completely get rid of the noise then you can find a way to minimize it.
For example, it could be fan that is present in the recording room making all the extra noise or it could be noise coming from outside the house, entering the room via an open window. You need to make sure you scan for these types of things and figure out a way to either eliminate them completely or minimize them or record away from them.
The room scan is so important because at times the better option would be just to do your recording in another room that is less noisy. It’s always better if you have an alternative or contingent room in which you can record just in case.
However if you only have one room available you can still do your best to reduce that noise by becoming aware of it and recording away from it, or getting rid of the noise or minimizing it.
Avoid Recording Near Bare Walls
Untreated bare walls are a nightmare when it comes to recording from home. Bare walls reflect sound that ends up being captured by your microphone.
For example If you are recording guitar whilst playing it near a bare wall, technically what is happening is that sound is being bounced from the bare wall and being recorded back into the microphone.
Which means your microphone is picking up what you’re playing plus the sound reflection of the guitar bouncing off the bare wall.
Therefore if you want to get rid of these annoying sound reflections that bounce off bare walls, all you need to do is to record away from the bare walls.
You might be thinking recording away from the bare wall might mean being in the center of the room but that is not the case. Recording in the center of the room has disadvantages because your microphone can sometimes pick up resonance.
Hence you need to test your microphone in different spots of the room that are away from the bare wall but are not necessarily in the center of the room.
The key take away here is that bare walls in a room will allow sound waves to bounce back and forth between them, resulting in reflections of sounds that the microphone will pick up; therefore it is essential that you record away from these bare walls or you sound treat the recording room to avoid capturing sound reflections.
Simple mediums like blankets, curtains, bookcases can also help in reducing the reflections of sound if they are placed on the bare walls.
The more professional way of handling it is probably soundproofing the room but the do-it-yourself version of using simple things like blankets or curtains or utilizing a wall that has bookcase filled with books can be an advantage, especially if you cannot afford to sound proof or acoustically treat the room.
Here are some of the ways you can soundproof an existing wall
Avoid Recording Too Far From The Mic
The human ear compared to a microphone is almost a hundred times better, our ears are connected to our brains and that makes them perfect by design. The human ear is able to filter.
Our ears are able to pay attention to what we want to hear in a noisy room. There could be 30 people in a room all having conversations and you are able to pay attention to the one conversation that you want to hear.
That is the brilliance of your ears, they can pay attention to what you deem as important even if you are within a room with a thousand different noises coming from different mediums.
Microphones on the other hand record everything within range; they cannot tell the difference between noise and the actual sound that we want to record. Therefore a mic will record and hear everything that touches it, from the loudest thing in the recording room to the most subtle thing like a lighter flick or your phone vibrating.
The trick here is that, the louder the sound, the more superior it will be and the more the microphone will hear it and record it. This is an advantage because if the person recording is loud when recording, the microphone will pick up their vocal and ignore the more subtle sounds.
Hence you need to get closer to your microphone when recording in order for it to pick up the loud vocal and therefore overpower the more subtle sounds.
There is a problem with being too close to the microphone though, this problem is something called the Proximity Effect.
The proximity effect is an increase in the low frequency response that occurs when the medium producing the sound is close or starts getting close to the microphone.
In not-so-techy language, being too close to the microphone can result in the low end of the recording being muddy or being too bassy.
The remedy is to test the proximity effect; try recording close and not so close to the microphone and see how the low end varies in the recordings and then make a judgement of how best you should record whilst taking the proximity effect into consideration.
Furthermore, you can also use an EQ on the vocal after recording it and try to cut off some of the low end so that the vocal can fit properly in the mix.
The other challenge you might face when recording too close to the microphone is that there will be variance in the vocal if you bop or move your head while recording.
So you need to keep that mind while you record, you can also utilize compression during the mixing process to try and even out the vocal if you notice that there is some variance in the wave of the recording.
Aim The Back of The mic Toward Unwanted Noise
Cardioid microphones which are typically used in studio recording are designed in a way that they pick up sound from the front and not the back.
Some cardioid mics come with a light in the front that indicates that you should record facing the light. Any sounds coming from the back of the microphone will not be picked up hence the tip here is to make sure that you are facing the front of the microphone when recording.
Also make sure that the back of the microphone is facing the noise you are trying to avoid because the microphone will reject most of the sound coming from the back of it.
Use this to your advantage, for example if you have a buzzing sound coming from a light on the wall, you can easily make certain that the back of the microphone is facing that light.
You can also use this technique on your most sound reflective walls. You want to avoid bare walls so you can make sure you distance the microphone from the bare wall and then have the back of the microphone face that wall.
The technique of facing the back of the microphone towards the noise you’re trying to get rid of is one of the simplest ways you can use to reject unwanted noise and reject reflections of audio bouncing off walls.
Its good to understand what on and off axis means when working with microphones.
I have these posts on; what it means when a mic is off-axis and what on-axis means for a microphone.
Record in a booth or closet
When I first got into music production, I didn’t have any money for a proper recording booth and I utilized my closet as a recording space.
You shouldn’t think you can’t record music without a booth, my advice is get started with what is available to you and make the most out of it.
When you save up some money then go ahead and build and upgrade your studio to a better standard.
One of the ways to avoid noise when recording is to record in a booth that has been sound treated. This one is obvious but often the most over looked.
Vocal recording booths are able to absorb the sound of the room around you there by reducing noise, reverb and making your recordings drier and easier to work with. Typically you can build a vocal booth with a cost ranging from $700 to even as high $10,000.
But don’t panic, there are cheaper alternatives to using a recording booth; you can use a closet or you can use a reflective filter when recording.
Recording in a closet is ideal for a home based music studio when you don’t have a booth, just make sure that the closet you are looking to record in is filled with clothes or you have some blankets hanging on the wall that can suck up and absorb the sound while you record.
DO NOT RECORD IN AN EMPTY CLOSET. The clothes in a closet will serve as sound absorbers and will make sure that there are little to no reflective sounds bouncing off the walls of the closet and being recorded back into the mic. If your closet has any empty shelves make sure you stuff them with blankets or pillows.
The other option you can consider is using a reflective filter when recording.
You can get much cleaner vocals in an untreated space by utilizing a reflective filter. I’ve personally used reflective filters in spaces with no sound treatment at all and they work just fine. Just make sure that you do not place the microphone too far into the reflective filter, otherwise you might encounter some frequency build up.
Still not sure whether you need a recording booth? READ THIS
Use The Right microphone
This is pretty much self-explanatory.
You need to use a microphone that is purely intended for music production, and make sure you connect it properly so that you don’t experience any feedback noise that may come from bad connections.
The mics polar pattern determines how much of the surrounding space will be included in the recording.
If you are using a microphone pre-amp, you may encounter a little noise from it. Pre-amps will vary; some will be noisier than others. Hence it pays to do your research before you buy one.
You also need to be aware of the noise level of your microphone; the best way to test this idea is to test a variety of mics.
There are quieter and louder mics, the quieter ones when used with a pre-amp or an audio interface will produce little to no noise even if the gain is turned all the way up.
On the other hand, you may experience some noise issues with louder mics when you use them with pre-amps or audio interfaces.
It is really important to experiment and figure out if it is the pre-amp producing the noise or the audio interface. Make sure you are able to produce clean gain and a relatively low noise-signal ratio.
Check out these vocal microphone recommendations.
Fix Electrical Noise Issues
There are number of different things around your studio that may bring up electrical issues.
One primary example is you may have some component that is plugged into an outlet that is causing or bringing about some sort of interference. Its situations like these that you have to pay attention to.
Eliminating the room noise and reflections is one thing, but sometimes you may be faced with noise from your electronic connections which may cause something of a hiss or a hum noise.
One of the remedies in this type of situation would be to unplug everything and start plugging them back in one by one in order for you to find the source of the problem.
After you find the source of the problem then you can try and figure out why that particular connection is bad.
Try and plug the connection causing that noise into a different outlet, or try and use another cable to connect to an outlet. Plugging everything back one by one will be so useful in figuring out the root of the problem.
These electric hum noises may be ground loop hums and they especially occur when you have more than one piece of equipment connected to an AC at different locations, then connected together via signal cables like an HDMI, whose shielding is connected to the ground.
In this situation I would recommend using a HUM X, as it will successfully eliminate the ground loop noise safely.
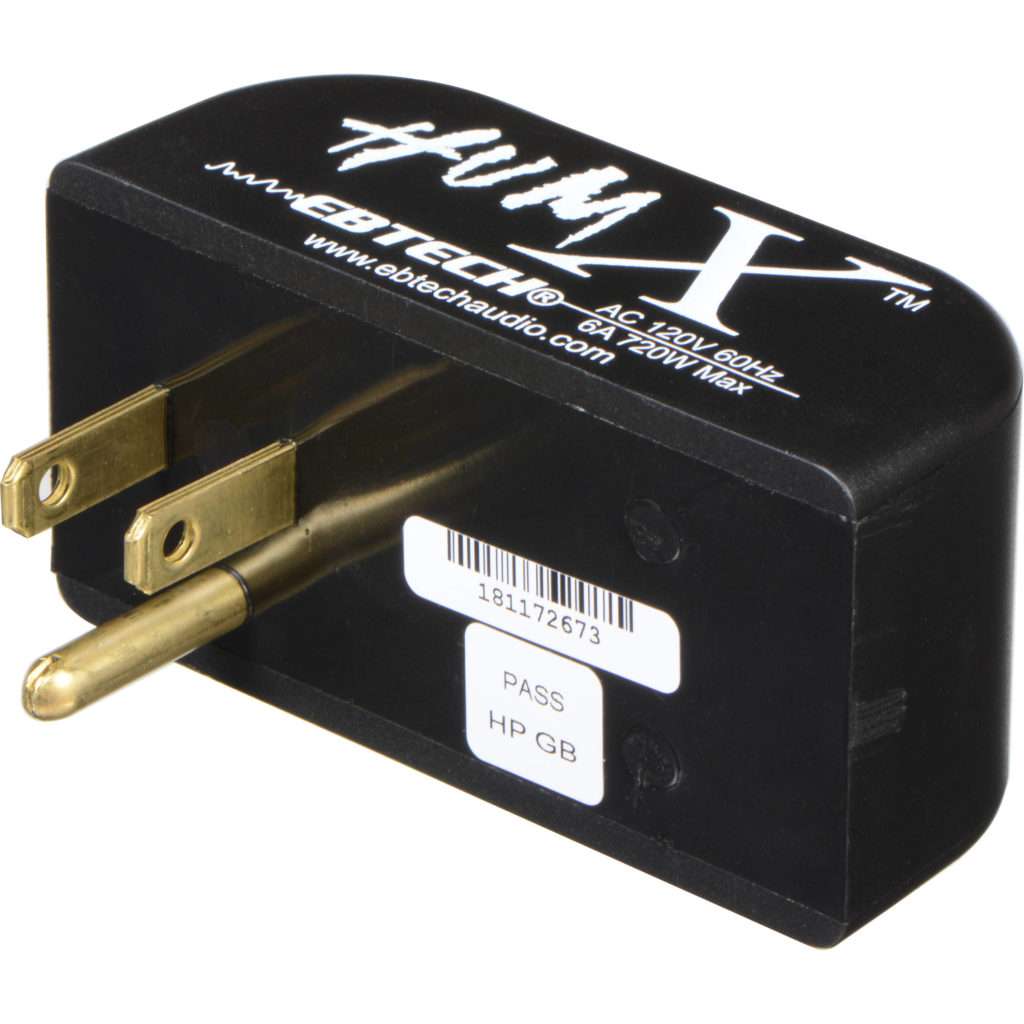
A Hum X is an adapter that provides a safe ground and eliminates unwanted voltage and current in a ground line that may cause ground loop noise. Thereby tackling and fixing problems like
- Loss of volume and,
- Loss of tone
A hum x is the safest way to get rid of electrical issue noise.
In rare cases you may experience hum noise because of the wiring in your house, the only disadvantage in this type of situation is that it costs money to have an electrician go through and check your wiring and ensure that it’s done properly.
So it is wise that you first check your components individually and try to narrow down the problem.
The last tip is use shorter cables, the longer the cables are, the more they tend to act like antennas when you use them and the more they will be susceptible to picking up transmissions hence the shorter, the better.
Most people wonder whether XLR Cables do actually sound better. This post will explain whether they actually do.
Record In Takes To Avoid Periodic Noise
One of the easiest techniques to avoid noise that is not constant but occurs from time to time, is to record in takes, keep the good parts and cut out the bad parts.
For example, your neighbor’s dog might be barking whilst you are trying to get some work done, you can record when the dog stops barking then pause the recording process when the dog starts barking again.
This technique also works for people that live in the city where you have noise coming in from different locations. You can have a work around schedule that allows you to work on a song at different times in different takes.
The key here is to keep working, don’t wait for the environment to be perfect. You can combine and utilize all of the other ways of combating noise explained in this post and try to record as well as you can.
Always Use A Mic Suspension, Audio interface and A Pop Filter
One of the easiest ways to get rid of noise in your recording process is to optimize your recording setup.
Get a proper mic stand that you will put your microphone on, so that it is steadily held into place rather than holding it in your hand.
Mic suspensions or shock mounts are also very useful when you are trying to record with the least noise possible. The main purpose of a mic suspension is to isolate the microphone from noise transmitted mechanically.
You can also use an audio interface as an external sound card in order to avoid noise that may come with your equipment.
Internal soundcards are often susceptible to electromagnetic noise especially in desktop computers.
Basically all components that are inside your computer produce electromagnetic noise because of the current that passes through them. This noise pollutes the audio signal that the sound card processes. The noisiest components are the fan, power supply and hard disk.
An audio interface will strongly reduce these electromagnetic noises and that is why I recommend it.
Also be sure to utilize a pop filter in order to avoid pops in the mix.
Sound Proof Your Studio Room
One of the other ways you can ensure that you record music without noise is to sound proof the room you’re using to record.
Basically you can use anything that is going to absorb sound and not have it bounce off the wall and be recorded the second time.
The best things you can use when at home are blankets or towels for the wall, but you can also use professional acoustic treatment equipment to sound treat your room.
You can use some bass traps and apply some acoustic treatment in the room, there are materials available on the market that will not cost a lot of money. You can use these materials to improve the acoustic noise level of your home studio.
I have in-depth post about how you can soundproof a music studio, you can check it out here.
Use Fewer Gear In recording
The lesser the components you have in the signal flow, the less self-noise will be added to the recording signal.
Avoid having a lot of gear within the equipment chain because these components will have their own self noise and the more gear you add to the chain, the more noise you introduce into the recording.
Conclusion
Key Points to take away from this post in order to record music at home without noise:
- Make sure you scan the room and figure out the spaces which you can record in with the least noise possible. Become aware of your space.
- By all means don’t record your vocals near bare walls because they reflect sound.
- One way to make sure your microphone doesn’t pick up noise is to get closer to it when recording, but take the proximity effect into consideration.
- Record your vocals facing the front of the microphone and make sure that the back of the microphone is facing the noise that you are trying to avoid.
- Record in a booth or try and record in a closet filled with clothes because clothes can absorb sound reflections.
- Record your vocals using an appropriate microphone intended for music studio work.
- Fix any electric issues that may introduce ground loop noise into the recording.
- Record in takes and keep the good parts in the recording.
- Use a mic suspension, an audio interface and a pop filter.
- Soundproof your recording room.
- Use fewer gear in your recording.
Related Articles You Might Find Helpful
How You Can Record Professional Vocals At Home
How Can I Record My Own Music At Home?
How Do I Record A Song Professionally?
26 Music Production Exercises That Will Improve Your Skills
How Do I Make My Music Studio Sound Quality?
Helpful Resources
Below are some of the resources that you can learn more from:
Home Studio Expert – How To Record Music At Home Without Equipment
iZotope – 7 Home Recording Studio Hacks for the Bedroom Producer
One thought on “How To Record Music At Home Without Noise”