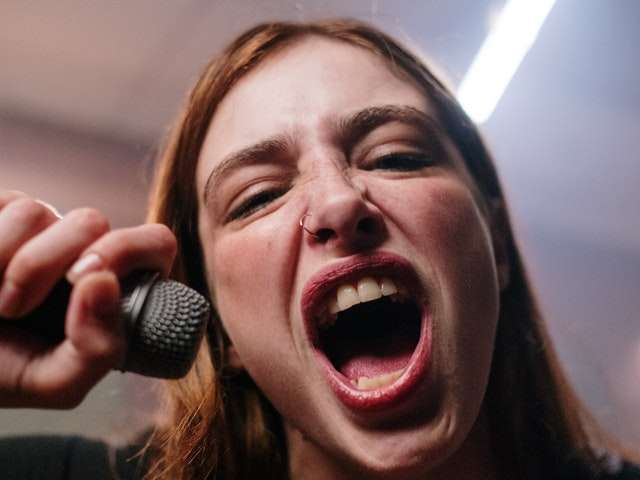
Recording loud vocals can pose a challenge especially if you don’t know what you’re doing,
that is why you have to ensure that you understand how best you can tackle loud vocal projection recordings whilst avoiding distortion.
Distortion basically comes in when a particular audio signal is too strong or too over powering,
leading to the recording components being unable to cope with the incoming signal resulting in parts of the audio signal being lost which makes the audio signal sound like a distorted raspy-like sound.
Some genres like EDM, Metal Rock and Pop may involve some loud vocal recordings therefore it becomes the duty of the recording engineer to be able to carry out the task properly.
In this article I go through some techniques that you can use in your recording when you’re particularly dealing with a loud vocalist or a session in particular that requires loud vocal recordings.
Gain
Gain is used to adjust the strength of an audio signal and it usually found on most audio interfaces, mixer boards and digital audio workstations.
The gain should not be confused with the volume because while the gain adjusts the audio signal strength,
all the volume does is just adjust the loudness of the signal as you hear it through your studio speakers or headphones.
Gain control can help you get the right input levels.
So for example if you have a microphone that has a higher output signal then you would typically using a very low amount of gain if you’re recording a particular person with loud vocals in order to avoid any distortion from the signal.
You would typically utilize a lot more gain if your microphone output level was low, and the person you were recording had low vocal projection.
Therefore one of the ways you can avoid distortion and clipping when recording loud vocals is utilizing the gain of the pre amp, audio interface, mixer board or DAW in order to ensure that the peaks do not exceed the maximum dynamic range.
The maximum dynamic range is usually indicated by 0db or by an overload LED indicator.
Therefore you have to make sure that your microphones signal does not exceed 0db,
so you can reduce the gain to compensate for the loud vocals this will ensure that the signal that is recorded doesn’t clip or distort.
Your main goal here will be to get as close as possible to 0db without exceeding it.
One key take away when it comes to gain is that; depending on the gain level you have set, your input signal with either gain strength or lose strength.
Find out if you should actually use microphone gain
Use a pop filter
When it comes to recording loud vocals, pop filters are really handy.
Utilizing a pop filter can be helpful because most recordings done without a pop filter usually have vocals that have prominent sounding B’s and P’s.
This problem can be further amplified if the person recording is pretty close to the mic.
This is why you need a pop filter to be able to completely eliminate all these plosive sounds.
Pop filters are great to use in loud recording sessions because they are able to tackle issues both on the high end and low end,
which makes it easier for you to edit all your frequencies.
The truth is that, one of the main things that you will be faced with in recording loud vocal projections is distortion so you have to properly account for it.
Using a pop filter can be one of the ways that you tackle and account for distortion;
another advantage of using pop filters is that you can be rest assured that the impacts of fast moving air on the microphone will be eliminated.
Another great advantage of using a pop filter is that it can help you to reduce on sibilance which is the hiss sounds commonly from words that have the letter “S” in them.
So, does it matter the pop filter that you get? find out here
Don’t record directly into the Microphone
Another way you can tackle loud vocals is not to record directly into the microphone,
another alternative you might want to try is backing away from the microphone and recording a bit far from it or you could simply turn your microphone a tad bit away from your mouth or input audio source.
Another way of tackling a loud vocal is using a unidirectional dynamic microphone instead of a condenser microphone.
Condenser mics are highly sensitive by design which makes them not best suited for loud vocals, dynamic microphones on the other hand much more able to deal with loud vocals.
Also avoid being too close to the microphone in order to avoid running into the proximity effect problem.
Compression
You can put some compression on the track being recorded in. One thing you can count on with compression is consistency and uniformity in the vocal.
When using a compressor I highly recommend using pre fader metering too.
Essentially pre-fader metering determines where the audio signal level will be measured along the signal flow on a channel strip,
and you have to make sure that the vocal doesn’t go into the red.
The rule of thumb here is that for aggressive vocals a compressor is a must this is due to the variety of the swings in the dynamic range of loud vocals.
You can use compression in post-production but I highly recommend that you have it already on the mixer channel that your recording is being routed to.
To learn more about recording with compression check out this post.
as an example:
When recording loud vocals I like to use the following compression settings/parameters:
- Firstly, I set the makeup gain to around 2db
- Secondly I usually have my ratio set to 2:1
- Thirdly I like my attack time between 15ms to 30ms, the key being that the more I increase the attack time the more punchier the vocal gets
- Fourthly, I set my release time to around 40ms
- Lastly I use a threshold well below the vocal to about -24db
Be reminded that these settings are basically a rough estimation of I what I go for most of the time,
what you’ll need is to experiment with your compression plugin using your own parameters.
Vocals differ so you cannot take my settings as the only settings that you could use. But they can you context.
So experiment with your plugin and the vocal.
Compression is about normalizing the louder peaks and basically reducing their volume; to achieve this you need a fast attack time and a higher ratio.
As a personal preference I also like to cut the low end of the particular input signal,
I do this to basically reduce the fighting of frequencies between the vocals, and the instruments (bass, kick, snares etc) present in the instrumental.
Cutting the low end might also work in your best interests if you’re using a condenser microphone to record the loud vocals because condenser mics tend bring out the lows more prominently than dynamic microphones.
The Vocalist
Whilst recording vocals may have to do equipment and all these techniques that are mentioned in this post,
but remember without the vocalist, there isn’t a vocal to record.
It’s really essential to have the vocalist prepared before the session,
because there isn’t anything in this world that will magically perfect a poor vocal performance.
That is why you have to ensure that the recording artists have all the bases covered.
Conclusion (The Process)
As a process, recording loud vocals can be easily done with the techniques mentioned in this post.
The process begins with the vocalist being prepared and trained to be able to record loud vocals; this requires some work on the vocalist’s part.
The second step is getting the right microphone,
a dynamic microphone is more ideal in this case, but you could consider using a condenser microphone provided that you take the low end into account and cut it out.
The third step is learning various microphone techniques, in this case you’re recording an overpowering vocal,
and therefore you may have to record a bit far away or you can simply not record directly into the microphone by simply not facing it directly but facing it at an angle.
The goal here is trying to account for the extra strength in the vocal that may distort if it is recorded too close to the microphone.
The third step also involves picking the right pop filter depending on the microphone that you intend to use, the pop filter will help with sibilance and plosive sounds.
The Fourth Step now that you have your microphone set up with your pop filter ready and the recording artist ready to experiment the various microphone techniques,
you can then start dealing with the gain, either in the DAW, or on the mixer or your audio interface to ensure that the recorded signal is properly optimized not to distort.
Remember that the gain can and should improve your output signal either by giving a low input signal some strength therefore improving the output or by simply reducing the strength of the input signal to avoid distortion and clipping.
The Fifth step is introducing compression into the equation. Compression will help with uneven parts in the vocal therefore ensuring that the vocal sound balanced and even without some parts sounding too loud or too dull.
You can use the compression on the particular channel into which the vocal is being recorded or you can use the compression that comes with some mixers to get the right vocal.
I hope you found this article helpful.
Related Articles You Might Find Interesting
What Effects Make Vocals Sound Better?
How You Can Record Professional Vocals At Home
What Is The Difference Between Saturation And Distortion?
Additional Helpful resources
Recording Loud Vocals – Gearspace.com
2 thoughts on “How To Record Loud Vocals Without Distortion”